Getting started
This page was created to guide participants at the beginning of their journey in the program. The first step is to get familiar with the program website and install the Astrometrica software.
If you want, you can also follow a video version of this process available on the program’s YouTube channel: https://www.youtube.com/watch?v=NFQ8b3Fnf0Y.
IASC website
The program website is where you can install Astrometrica, access the images that will be analyzed, and submit your results. The site can be accessed here: https://iasc.cosmosearch.org.
Each stage of the training will explain what to do on the site.
Downloading Astrometrica
Inside the IASC website, click on the section called Astrometrica. There, click the Astrometrica Setup button according to your version of Windows to start the download.
After the download is complete, extract the files from the compressed folder and run the installation file setup.exe.
Then simply follow the installer instructions to complete the software installation. After installation, just open Astrometrica using the shortcut created on the desktop.
⚠️ Attention: We do not recommend installing Astrometrica in a location different from the one suggested by the installer, in order to avoid configuration problems and future error-solving issues.
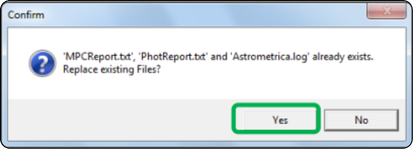
After the software opens, press Yes on the message asking to clear the report files. This should be done every time you open the program to ensure that previous analysis files are cleared and do not cause confusion with new results.
Configuring Astrometrica
The first time you open Astrometrica, you need to configure the software so that it works properly. To do this, follow the steps below:
- Registration for use
You can use Astrometrica for free for 100 days. However, for continued use after that, a registration license is required. For program participants, the license is free and sent by email to the team leader. If you have not yet received the license, contact the training team to request the registration code.
To enter the license, click Help → Registration and enter the registration code provided.
- Configuration
Click the first icon on the top toolbar to access the software settings. 🔧 Edit Program Settings.
- Go to the Program tab and select Gaia DR1 as the Star Catalog;
- Then, in the CCD tab, under Color Band, select Gaia Broadband (G);
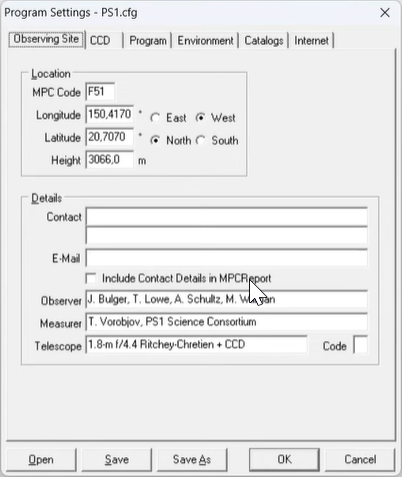
- Finally, you need to choose the configuration file for image analysis. To do this, click the Open button (if necessary, navigate to the folder where Astrometrica was installed, then open the Settings folder) and select the file PS1.cfg. During the campaign, images may use either the PS1 or PS2 configuration, indicated in each image’s file name. Whenever necessary, repeat this process to select the correct file for the image you are going to analyze. This will be explained further ahead.
- Click Save and then OK to complete the configuration.
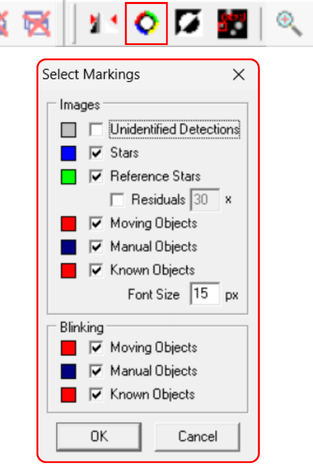
Now, back on the main software screen, click the eighth icon on the top toolbar, Select Markings. The image below shows the recommended configuration for this step, with the marking options indicated. After configuring it, click Ok to finish.
At the end, in the bottom right corner of the screen, the settings should be displayed as follows:
![]()
Done! Your software is configured and ready to start image analysis. In the next steps, you will learn how to access the images, open them in Astrometrica, and follow the general analysis workflow to obtain the expected results. Happy hunting! 🧑🚀☄️
Next step
After completing this initial setup, move on to the practical part of the documentation, especially the page General analysis workflow, where the complete process will be explained in an organized way.